Okay, here's a detailed
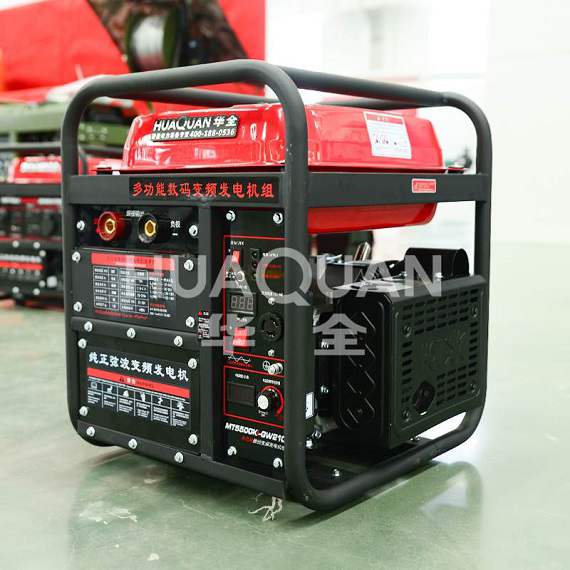
portable generator maintenance guide, covering both daily maintenance and preparation for long-term storage. Regular maintenance can significantly extend the life of your generator, ensuring it starts reliably and operates properly during critical situations (such as power outages).
Before performing any maintenance:
Always allow the generator to completely stop and cool! A hot engine can easily cause burns.
Disconnect the spark plug wires to prevent accidental starting. This is a critical safety step.
Work in a well-ventilated area. Avoid the accumulation of fuel, oil, or exhaust fumes.
Wear appropriate protective equipment: gloves (to protect against grease and burns) and goggles (to protect against oil splashes).
1. Portable Generator Fuel System Maintenance
Fuel problems are the most common cause of generators failing to start or running erratically.
Choosing the right fuel:
Use fresh, unleaded gasoline of the manufacturer's recommended octane rating. This is usually 87 or higher.
It is strongly recommended to avoid, or at least limit, the use of gasoline containing ethanol (E10, E15). Ethanol is hygroscopic and absorbs water, leading to:
Phase separation: Water and ethanol separate and sink to the bottom of the fuel tank, corroding metal components (fuel tank, carburetor, fuel lines).
Gum and carbon deposit formation: Ethanol-containing gasoline easily oxidizes and deteriorates, forming a jelly-like substance that can clog carburetor nozzles and fuel lines.
If you must use gasoline containing ethanol, be sure to prepare it for storage (see below) and consider using a fuel stabilizer.
Fuel stabilizer:
Adding fuel stabilizer to your fuel tank is highly recommended at every refueling, especially when using gasoline containing ethanol or when your generator is infrequently used.
Select a reputable brand of fuel stabilizer.
Follow the product instructions for addition ratios.
The stabilizer slows down fuel oxidation, prevents gum formation, and helps resist the effects of moisture.
Fuel filter:
Check your owner's manual to see if your generator is equipped with a replaceable fuel filter.
If so, replace it at the recommended intervals (or if you notice any problems with the fuel flow).
2. Portable Generator Oil Maintenance (The Lifeline of the Engine)
Oil lubricates the engine's internal moving parts, dissipates heat, and removes impurities.
Choosing the Right Oil:
Strictly follow the manufacturer's recommended oil type (e.g., SAE 10W-30) and grade (e.g., SJ, SL, SN). Four-stroke generators typically use multi-grade oil, similar to that used in automobiles.
Cold climates may require a lower viscosity oil (e.g., 5W-30).
Make sure it's a four-stroke oil! Two-stroke generators use premixed fuel.
Checking the Oil Level:
Check the oil level before each use of the generator! Running at a low oil level can quickly damage the engine.
Changing the Oil:
Changing the Oil After the Initial Run-in: A new generator or one that has been overhauled typically requires its first oil change after the first 5-10 hours of operation (check the manual for details). This removes metal debris generated during the run-in period.
Regular Oil Changes: Thereafter, change the oil at the intervals specified in the manufacturer's manual (usually every 50 hours of operation or once a year, whichever comes first). The replacement cycle should be shortened when used in harsh environments (dusty, hot, or under prolonged heavy loads).
3. Portable Generator Air Filter Maintenance (Preventing Dust from Inhaling into the Engine)
A dirty air filter can restrict air intake, reduce power, increase fuel consumption, and accelerate engine wear.
Inspection Frequency: Before each use or as specified in the manual (usually every 25-50 hours or after use in dusty environments). Clean or replace immediately if noticeable dirt is present.
Cleaning Method:
Paper Filter:
Carefully remove the filter (taking care not to allow dust to fall into the air intake).
Gently tap the filter (with the filter side facing down) to remove loose dust.
Never use compressed air to clean the inside of a paper filter! This can damage the micropores and render it ineffective. Instead, gently blow low-pressure compressed air from the outside (the dirty side) of the filter inward. Alternatively, use a soft-bristled brush to gently brush away any surface dust.
If extremely dirty or damaged, it must be replaced.
Foam Filter:
Remove the filter.
Wash in a mild detergent (such as warm soapy water) and gently rub.
Rinse thoroughly and squeeze dry (do not wring).
Let dry (very important!) or blot dry with a paper towel.
Apply a small amount of clean filter oil (usually included in the maintenance kit) as directed in the manual, evenly saturating the foam but avoiding any dripping. If filter oil is unavailable, clean without adding oil.
IV. Portable Generator Spark Plug Maintenance (To Ensure Reliable Ignition)
Inspection/Replacement Period: As directed in the manual (usually every 100 hours of operation or annually). Also inspect if starting is difficult, operation is unstable, or power is reduced.
Steps:
Stop the engine and allow it to cool. Disconnect the spark plug cap.
Use a dedicated spark plug socket wrench to remove the spark plug. Be careful not to drop foreign matter into the spark plug hole.
Inspecting the Spark Plug:
Electrode Gap: Use a feeler gauge to check that it meets the manual's specified value (usually 0.6-0.8mm). If the gap is incorrect, carefully adjust it with a dedicated tool (prying on the side electrode). Condition: Observe the center and side electrodes for carbon deposits, oil stains, and burnt-out conditions. A normal color should be light brown. Severe carbon deposits, oil stains, electrode burnt-out, or ceramic cracks require replacement.
Cleaning (if necessary): If the condition is acceptable but there is some carbon deposits, lightly sand the electrode tip with spark plug cleaner or fine sandpaper (be careful not to damage the electrode or ceramic). After cleaning, readjust the gap.
Replacement: Install a new spark plug of the specified model. First, tighten it by hand to avoid cross-threading. Then, tighten it with a socket wrench to the specified torque (usually, tighten slightly after it feels tight. Overtightening can damage the cylinder head threads). Finally, replace the spark plug cap.
V. Portable Generator Cooling System Maintenance (Preventing Overheating)
Keep the Vents Clean: Regularly use a soft brush or low-pressure compressed air to remove dust, debris, leaves, cobwebs, etc. from the engine block cooling fins and fan cover inlet/exhaust ports. Blockages can lead to poor heat dissipation and overheating. Check the fan impeller: Ensure the fan blades are intact, free of cracks or deformation.
VI. Portable Generator Battery Maintenance (Applicable only to models with electric start)
Charge Status: Even when not in use, check the battery voltage regularly (at least once a month) and recharge it if the voltage drops below approximately 12.4V (using a suitable float charger).
Charging: Use a smart charger or float charger designed for small motorcycle/generator batteries to avoid overcharging and damaging the battery. Standard car chargers draw too much current.
Long-Term Storage:
Fully charge the battery.
Disconnect the negative battery cable (Important!).
Store the battery in a cool, dry place (preferably 0-25°C). Avoid extreme heat or cold.
Check the voltage and recharge it every 1-2 months.
Cleaning: Keep the top of the battery clean and dry. Check the terminal for corrosion (clean with baking soda and water, then apply petroleum jelly to prevent corrosion) and ensure the connection is secure.
Preventive maintenance is key. Regular, proper maintenance saves time, effort, and money, rather than waiting until a problem occurs to repair it. It also ensures your generator is always ready for use in an emergency.
Follow this maintenance guide to ensure your portable generator provides longer, more reliable service.